How to Clean a Chainsaw in 10 Easy Steps
To clean your chainsaw in 10 easy steps, start by disconnecting its power source and safely removing any fuel. This is crucial for your safety and to prevent any accidental starts.
Next, loosen the chain tension so you can remove the chain and the guide bar easily.
Now, grab some brushes and a degreaser to clean the cooling slots, sprocket, and the engine exterior. These areas often collect dirt and debris that can affect performance.
Soak the chain in a degreaser solution to get it thoroughly clean. Don’t forget to clean or replace the air filter to keep your chainsaw running smoothly.
After that, lubricate the chain overnight to ensure it stays in good condition.
Once everything is clean and oiled, reassemble the chainsaw.
Finally, check the oil levels and make sure all safety features are working properly.
Following these simple steps will help keep your chainsaw performing smoothly and extend its lifespan.
Key Takeaways
- Disconnect power and wear protective gloves before starting to clean your chainsaw safely.
- Remove the chain and guide bar by loosening the tension and detaching the side cover.
- Clean internal parts and external surfaces using brushes, compressed air, and degreasing solvents.
- Soak and dry the chain, clean the guide bar oil passages, and maintain the air filter properly.
- Reassemble, lubricate the chain, check oil levels, adjust tension, and perform a final safety inspection.
Ensure Safety and Prepare Your Workspace

Before you begin cleaning your chainsaw, make sure you disconnect it from power by removing the spark plug or battery to prevent accidental startup. Prioritizing safety is vital, so always wear protective gloves to protect your hands from sharp edges and debris.
Set up your workspace on a stable surface like a workbench, ensuring the chainsaw rests securely with its base flat against it. Clear your cleaning area of clutter to keep tools organized and within reach, which helps prevent accidents.
Placing a towel or mat underneath the chainsaw stops it from slipping and catches any debris or drips during maintenance. By preparing a clean, stable workspace and keeping your chainsaw safely disconnected, you create a safer environment and make the cleaning process smoother and more efficient.
Disconnect Power and Drain Fuel

Once your workspace is ready and the chainsaw is safely disconnected, focus on cutting off its power completely. If you’re using an electric chainsaw, make sure it’s unplugged from the outlet to avoid any risk of it becoming energized during cleaning.
For a gas chainsaw, start by unscrewing the fuel cap carefully, then drain remaining fuel into an appropriate fuel container. This step is vital—you don’t want any fuel left inside that could spill or cause hazards.
Always handle fuel in a well-ventilated area, away from flames or sparks. Ensuring the chainsaw has disconnected power and that you’ve drained fuel properly keeps you safe and prevents accidental startup while you clean.
Never work on an energized or plugged-in chainsaw.
Remove the Chain and Guide Bar

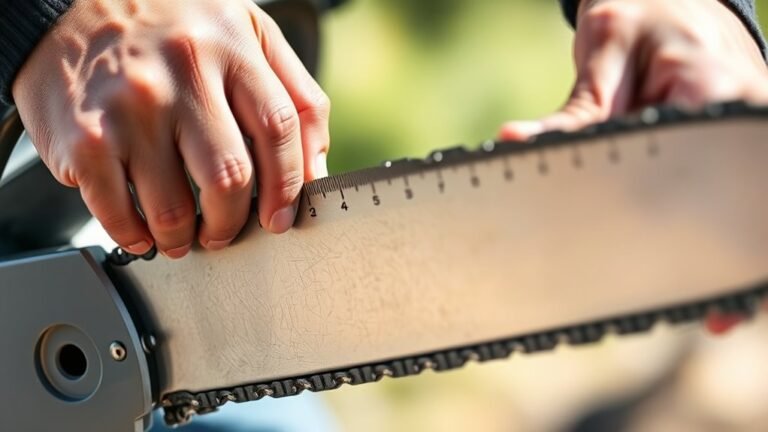
To remove the chain and guide bar, start by loosening the chain tension using the adjustment screw or dial; this will make it easier to lift the guide bar away from the chainsaw.
Next, carefully unscrew or flip the side cover to access the guide bar assembly. Make sure to wear thick gloves to protect your hands during chain removal since the chain’s sharp edges can cause injury.
Gently lift the guide bar away from the chainsaw, ensuring the chain is free and not caught on any internal parts. During cleaning, keep track of all loose parts and screws to ensure smooth reassembly.
Properly loosening the tension and handling the guide bar assembly carefully are key steps for effective chain removal and cleaning. It’s a straightforward process once you get the hang of it!
Clean the Cooling Air Slots and Sprocket Area
Although often overlooked, cleaning the cooling air slots and sprocket area is essential for keeping your chainsaw running smoothly. You need to remove any dust and debris that block airflow or cause dirt buildup.
This buildup can lead to overheating and chain issues, so it’s worth taking the time to clean these parts regularly.
To clean these parts effectively, start by using a small brush or compressed air to clear out dust and debris from the cooling air slots on the chainsaw body.
Next, remove the sprocket cover and inspect the sprocket area for dirt buildup. Clean it thoroughly with a brush or compressed air.
If you come across stubborn grime around the cooling slots and sprocket, try applying resin remover or a degreasing solvent. Then, just wipe it clean.
Keeping the cooling slots and sprocket free of obstructions ensures proper operation and extends your chainsaw’s life. So, don’t skip this simple but important maintenance step!
Soak and Clean the Saw Chain
Because grime and resin can severely affect your chainsaw’s performance, you’ll want to soak the saw chain in a cleaning solution to loosen buildup before scrubbing it clean. Submerge the chain in water mixed with household ammonia for 10-20 minutes, or use a biodegradable degreaser or lye for tough grime.
After soaking, rinse thoroughly, then dry completely to prevent rust. Follow with proper lubrication to keep your chain running smoothly.
| Step | Solution | Time |
|---|---|---|
| Soak | Water + 1 cup ammonia | 10-20 minutes |
| Heavy grime | Biodegradable degreaser | Until clean |
| Rinse | Clean water | Immediately |
| Dry & Lubricate | Paper towel + oil | Thoroughly |
This routine makes sure your saw chain stays efficient and sharp. It’s simple but really does the trick!
Clean and Dress the Guide Bar
Start by removing any burrs and ridges from the guide bar to keep it running smoothly. This helps prevent any snags or uneven wear while you’re working.
Next, clean the oil passages to guarantee proper lubrication during use. You want to make sure oil flows freely so everything stays nice and cool.
Finally, apply a light coat of protective oil to prevent rust and extend the bar’s life. It’s a simple step that really pays off in the long run.
Removing Burrs and Ridges
When you remove the guide bar from your chainsaw, you can closely inspect it for any burrs or ridges along the edges. These imperfections can affect the chain’s performance and cause uneven wear.
To remove them, follow these steps:
- Use a guide bar dressing tool or a fine file to gently smooth out ridges and burrs on the guide bar’s rail surface.
- Carefully inspect the guide bar groove for debris or uneven wear and clean it with a small brush or compressed air.
- After dressing, apply a thin layer of bar oil to keep the surface smooth and prevent future ridges.
Regularly cleaning and dressing the guide bar maintains proper chain tension and extends the life of your chainsaw.
It’s a simple process but makes a big difference in how well your chainsaw works. So, don’t skip this step when you’re doing maintenance!
Cleaning Oil Passages
Although you’ve already removed the guide bar, don’t overlook the importance of thoroughly cleaning the oil passages and groove. Begin by inspecting the oil inlet and oil outlet holes on the guide bar for any debris or blockages that could hinder proper lubrication.
Use a small wire or toothpick to carefully clear these passages. Next, apply a degreasing solvent to the oil groove to dissolve built-up resin and dirt. After letting it sit briefly, use compressed air to blow out any remaining particles from the oil passages.
Regularly check and clean these areas to guarantee smooth oil flow. Once you’ve removed all blockages and debris, reassemble the guide bar, confirming the oil passages are completely clean for excellent chainsaw performance.
Applying Protective Coating
Before reassembling the guide bar, apply a protective coating to shield it from corrosion and reduce friction. After cleaning off dust and debris, use STIHL guide bar oil or a specialized dressing to safeguard the bar’s surface.
To make sure the dressing spreads evenly, follow these steps:
- Use a soft cloth or dressing tool to apply a thin, even spread of the protective coating along the entire guide bar.
- Avoid over-application, as excess dressing attracts dirt and increases wear.
- Reapply the protective coating regularly during maintenance or after exposure to moisture.
Doing this regular maintenance helps prevent ridges and burrs, ensuring smoother chain operation and extending the bar’s life. Proper dressing keeps your chainsaw running efficiently and protects your guide bar from corrosion.
Clean the Chainsaw Engine Exterior
A clean chainsaw engine exterior not only looks better but also helps maintain efficient performance. Start by wiping the exterior with a damp cloth to remove dust and grease buildup.
Use a soft brush to clean vents, cooling fins, and other hard-to-reach spots. For stubborn grime, apply a degreaser, then wipe it off to restore clean surfaces.
Don’t forget to wipe the engine cover thoroughly. Make sure to dry all exterior parts completely to prevent rust and moisture before storing or reassembling.
| Step | Tool Used | Purpose |
|---|---|---|
| Wipe exterior | Damp cloth | Remove dust and grease buildup |
| Brush vents/fins | Soft brush | Clean hard-to-reach areas |
| Remove grime | Degreaser spray | Eliminate stubborn dirt |
| Clean engine cover | Cloth | Polish surfaces |
| Dry exterior | Dry cloth | Prevent rust and moisture |
Inspect and Clean the Air Filter
Start by removing the air filter cover and carefully taking out the filter. Check for dirt or damage, then clean it properly.
If it’s a foam filter, wash it with soapy water and make sure it’s completely dry before putting it back. For paper filters, you can gently tap or blow off any debris.
Finally, reinstall the filter securely to keep your engine running smoothly. It’s a simple step that really helps your engine breathe better!
Air Filter Removal
When you undo the clips or screws holding the top cover, you can carefully remove the air filter without damaging its frame or nearby parts. This step is essential to inspect and clean the air filter effectively.
Follow these steps to remove and check it properly:
- Remove the cover by loosening the clips or screws gently, ensuring you don’t strip them.
- Take out the air filter carefully, avoiding any damage to the filter or surrounding components.
- Inspect the air filter closely for dirt, dust, or debris buildup; if it’s clogged or torn, consider replacing it.
Removing the air filter correctly helps maintain your chainsaw’s performance and prevents dirt from entering the engine. This ensures a longer lifespan and smoother operation.
Cleaning Techniques
Although removing the air filter is essential, you must also clean it thoroughly to keep your chainsaw running smoothly. Start by gently brushing or tapping the filter to remove loose dirt and debris without damaging the filter material.
If you have an air compressor, use it carefully to blow out finer particles. Next, prepare a cleaning solution with warm water and mild detergent or a specialized cleaner designed for air filters. Submerge the filter and gently clean it, ensuring all grime is removed.
Rinse the filter thoroughly with warm water to wash away any remaining residue. Proper chainsaw maintenance means regularly inspecting and cleaning the filter to prevent engine issues.
After cleaning, set the filter aside for drying before reinstalling it, but we’ll cover drying and reinstallation in the next step.
Drying and Reinstallation
Once you’ve cleaned the air filter thoroughly, it’s important to let it dry completely before reinstalling it. A damp or wet air filter can reduce engine performance and cause damage.
Before reinstalling, inspect the filter carefully for any signs of damage like tears or holes. If it’s damaged or excessively dirty, replace it. Also, wipe the air filter housing with a damp cloth to remove any residual dirt.
Follow these steps to ensure proper drying and reinstallation:
- Allow the air filter to air dry completely in a clean area.
- Inspect the filter for damage and replace it if necessary.
- Reinstall the air filter, making sure it’s properly seated to maintain ideal airflow and engine function.
Lubricate Components and Reassemble the Chainsaw
Since proper lubrication is essential for your chainsaw’s performance, start by soaking the chain in a plastic bag filled with chainsaw oil overnight. This will thoroughly lubricate the chain and help prevent wear.
Soak your chainsaw chain in oil overnight to ensure thorough lubrication and reduce wear.
The next morning, wipe off any excess oil with an old rag to avoid dirt buildup. Now, carefully reattach the guide bar and chain, making sure the chain sits properly in the groove and loops around the sprocket.
Adjust the chain tension using the adjustment screw or dial so it’s snug but still moves freely. Once aligned, secure all covers and screws tightly.
Finally, test the chain’s movement to confirm everything is reassembled correctly. Proper lubrication and careful reassembly guarantee your chainsaw runs smoothly and safely.
Check Oil Levels and Final Safety Inspection
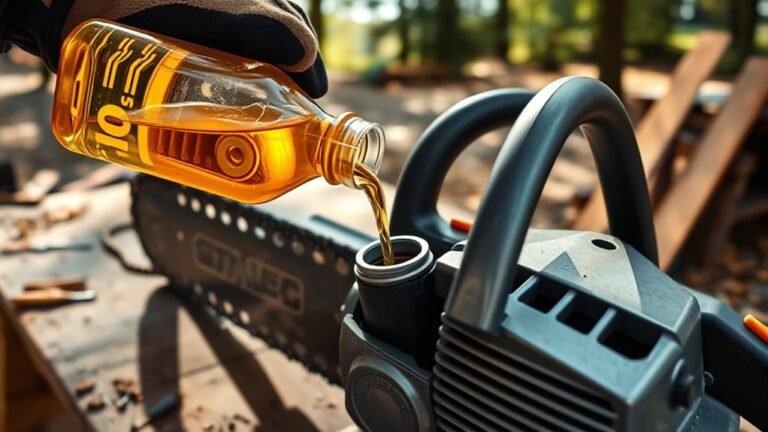
Before you start your chainsaw, make sure the oil reservoir is filled to the recommended level and the chain is properly lubricated.
Watch for an even oil flow on the chain during operation to confirm lubrication efficiency.
Finally, perform a safety check to verify all covers are secure and the chain brake is disengaged.
Confirm Oil Reservoir Fullness
Although cleaning your chainsaw is important, you should first confirm that the oil reservoir is filled to the recommended level. Proper lubrication prevents damage and guarantees smooth operation.
Here’s how to check and refill the oil reservoir correctly:
- Use the oil level window or dipstick to check the current oil level. If it’s below the minimum mark, fill the reservoir with the correct bar and chain oil.
- After refilling, securely tighten the oil cap to avoid leaks during use.
- Conduct a final safety inspection by ensuring the chain brake is engaged and all covers are properly reassembled.
Doing this helps keep your chainsaw running smoothly and safely every time you use it.
Inspect Chain Lubrication Efficiency
To guarantee your chainsaw runs smoothly, you should inspect the chain lubrication efficiency regularly. Start by checking the oil reservoir to ensure it’s filled within the recommended range.
Next, inspect the oil passage for any blockages or buildup. Cleaning it with compressed air or a small brush helps maintain proper oil flow.
Run the chainsaw briefly and observe the chainsaw chain. If it’s evenly coated with oil, your lubrication efficiency is sufficient.
If the chain appears dry or you notice smoke, the oil flow may be inadequate. This means you might need to do some more cleaning or make adjustments.
Finally, conduct a thorough inspection to confirm the chainsaw chain has proper lubrication and tension. This step ensures safe and efficient operation before use.
Conduct Pre-Use Safety Check
After confirming your chainsaw’s lubrication is functioning properly, you should check the oil reservoir one more time to guarantee it’s filled to the recommended level.
Next, perform a thorough safety check to ensure safe operation. Follow these steps:
- Inspect the chain tension and sharp chain to prevent kickback and ensure efficient cutting.
- Check the chain brake, throttle lock, and other safety features, confirming they work correctly.
- Examine the guide bar for wear or damage and clean the air filter and debris around vents for ideal airflow.
Completing this inspection guarantees your chainsaw is ready and safe to use.
Regular debris removal and maintenance keep your tool in top condition, reducing risks and improving performance every time you start it.
Frequently Asked Questions
What’s the Best Thing to Clean a Chainsaw With?
You should use biodegradable degreasers or mild soap mixed with water to clean your chainsaw. Avoid harsh chemicals, and use a soft brush or cloth to gently remove dirt and grease without damaging parts.
It’s really best to keep things gentle when cleaning. That way, you won’t accidentally harm any sensitive components. Just take your time and be thorough!
Can You Use WD-40 to Clean a Chainsaw?
You can use WD-40 to wipe grime and loosen grease. It’s also great for repelling rust—but here’s the catch: don’t spray it directly on the chain or bar.
Instead, clean those parts with degreasers first. Then, make sure you wipe off any WD-40 residue. This will help keep your chainsaw running smoothly.
Should You Clean a Chainsaw After Every Use?
Yes, you should clean your chainsaw after every use to keep it running smoothly.
Doing so prevents dirt buildup, rust, and mechanical issues, ensuring your chainsaw stays efficient and lasts longer.
Don’t skip this step! It really makes a difference.
What Should I Soak My Chainsaw Chain In?
You should soak your chainsaw chain in a mixture of one gallon water and one cup household ammonia for 10-20 minutes. This loosens dirt and gunk, making cleaning easier while protecting your chain.
It’s a simple step that really helps keep your chain in good shape. Just make sure to rinse it well afterward and dry it before using or storing.
Conclusion
Now that you’ve given your chainsaw a thorough spa day, it’s ready to roar back to life like a wild beast tamed. By keeping it clean and well-oiled, you’re not just maintaining a tool—you’re nurturing a trusty companion for every cut and carve ahead.
Remember, a happy chainsaw bites sharper and lasts longer. So, treat it right, and it’ll keep slicing through your toughest jobs with ease and grace. Regular chainsaw cleaning and maintenance not only improve performance but also extend the life of your equipment.
Taking these simple steps ensures your chainsaw stays reliable and safe to use. Keep up with routine care, and you’ll enjoy smoother, more efficient cutting every time you head out to work.