10 Easy Steps to Clean a Chainsaw Carburetor
First, disconnect the spark plug wire to guarantee safety. This step is crucial to prevent accidental starting while you work on the chainsaw carburetor. Safety first!
Next, remove the carburetor by draining the fuel and unscrewing the bolts holding it in place. Take your time here to avoid damaging any parts.
Disassemble its parts carefully, inspecting the metal strainer filter for dirt or damage. It’s important to check the filter because a clogged or broken one can affect performance.
Clean the filter and carburetor passages thoroughly using carb cleaner and brushes. Getting into all those tiny nooks will help your chainsaw run smoothly again.
Rinse and dry all components fully before reassembling, making sure the filter sits flush. This step ensures no residue or moisture remains that could cause problems.
Finally, reinstall the carburetor and adjust settings for smooth operation. Once everything is back in place, your chainsaw should start up and run like new.
Keep going to uncover detailed tips for each step and make your chainsaw maintenance easier than ever!
Key Takeaways
- Disconnect the spark plug wire and drain the fuel before removing the carburetor. This step is crucial for safety and helps prevent any spills.
- Carefully disassemble the carburetor. Remove the jets, screws, and the metal strainer filter so you can inspect everything thoroughly.
- Use carburetor cleaner spray along with compressed air to clean the passages, jets, and the metal filter. Make sure to get rid of all debris and buildup.
- Rinse the parts with clean water, then dry them with compressed air. After that, let them air dry completely to avoid any corrosion.
- When you reassemble the carburetor, place the gaskets and filters properly. Then reinstall the carburetor securely, reconnecting the fuel lines and linkages.
Disconnect the Spark Plug Wire
Why should you disconnect the spark plug wire before cleaning your chainsaw’s carburetor? You need to prevent the chainsaw from accidentally starting during the cleaning process.
Every time you work on the carburetor, make sure the chainsaw is completely turned off and the spark plug wire is fully disconnected. Always remove the wire by grasping the boot, not the wire itself, to avoid damage.
Disconnecting the spark plug wire provides safe access to the carburetor and other internal parts, reducing the risk of injury. Once you finish cleaning, reconnect the spark plug wire securely to restore proper engine operation.
Remove the Chainsaw Carburetor
After you’ve disconnected the spark plug wire to guarantee safety, the next step is to remove the chainsaw carburetor. Start by draining fuel from the tank and detaching the fuel lines to prevent spills.
Use a screwdriver to unscrew the mounting bolts holding the carburetor to the engine. Carefully detach the carburetor, noting the position of gaskets and linkages.
Keep all removed parts and screws organized for reassembly.
| Step | Tool Needed | Notes |
|---|---|---|
| Disconnect fuel lines | None | Prevent fuel spills |
| Unscrew mounting bolts | Screwdriver | Keep bolts safe |
| Remove carburetor | Hands | Note gasket and linkage placement |
| Organize parts | Container/Tray | Avoid losing screws and parts |
| Inspect components | Visual check | Prepare for cleaning |
Disassemble the Carburetor Components
Start by removing all external fasteners carefully to avoid stripping screws or damaging parts. Then, separate the carburetor into its main components, paying close attention to delicate pieces like springs and gaskets.
Keep everything organized in a neat layout so you can easily identify and reassemble each part later. It really helps to stay tidy during this step!
Remove External Fasteners
Before you can clean the carburetor, you’ll need to remove all external fasteners carefully. Start by using a screwdriver to take out the screws securing the carburetor cover. These are usually found on the side or bottom of the chainsaw.
Next, detach any external linkages like the throttle and choke levers. Make sure to note their positions for easy reassembly later on.
Remove the mounting bolts or nuts holding the carburetor to the engine. It’s important to keep track of every fastener so nothing gets lost.
Gently lift the carburetor away from the engine, being careful not to damage any connected hoses or fuel lines.
Finally, inspect and disconnect any external fuel or air hoses attached to the carburetor. Once that’s done, you’re ready to move on to the cleaning process.
Separate Carburetor Parts
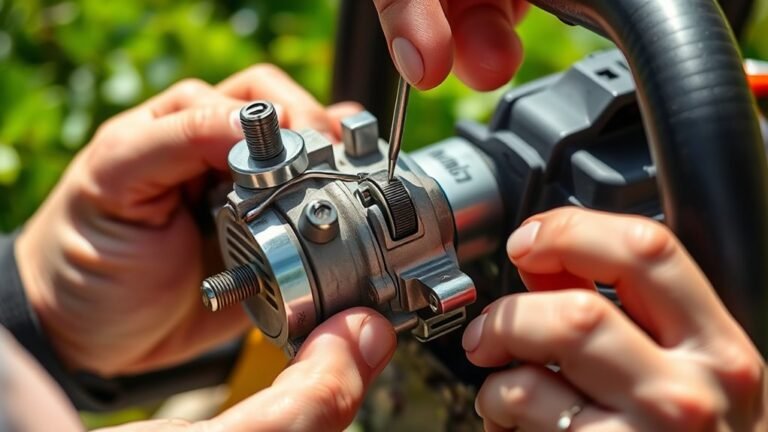
When you disassemble the carburetor, carefully remove screws, jets, and other small parts without forcing them to prevent damage. Use the right tools like screwdrivers and pliers to gently detach components.
Pay attention to how each piece fits, so you can reassemble them correctly later. Inspect every part for wear, corrosion, or debris before cleaning to know what needs extra attention.
Avoid rushing; delicate parts can break easily. Although you won’t organize components just yet, keep them in a safe place to avoid losing any pieces during cleaning.
Taking your time during this step guarantees the carburetor stays intact and ready for thorough cleaning, improving your chainsaw’s performance when everything’s back together.
Organize Components Neatly
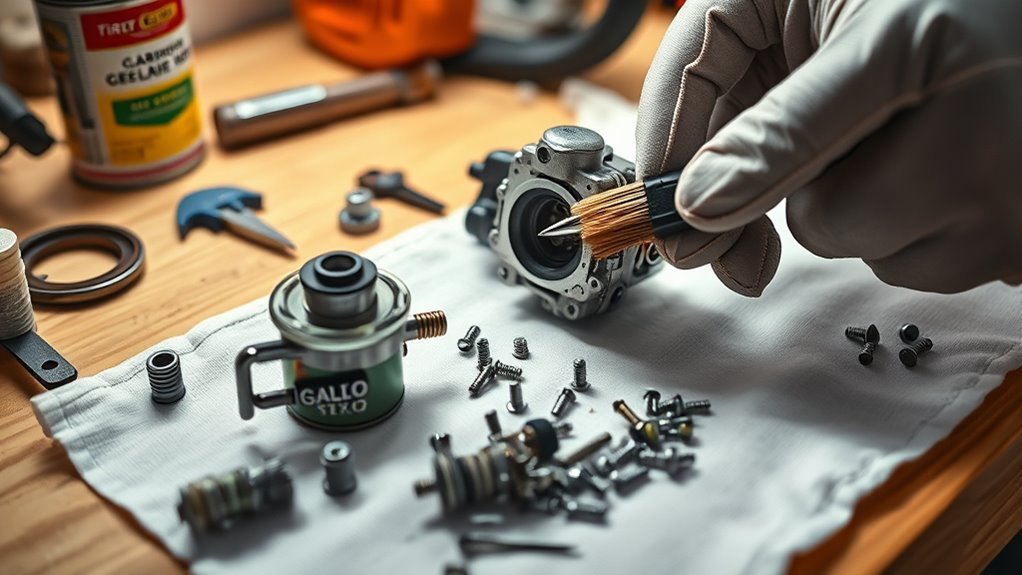
Although removing the carburetor from your chainsaw requires care, organizing its components neatly afterward is essential to avoid confusion during reassembly. Once you disassemble the carburetor, including the float, jets, and gaskets, lay each part out in a clean, well-lit workspace.
Use small containers or labeled trays to separate components and prevent misplacement. Take time to inspect each piece carefully for wear or damage, replacing any that look worn out.
Clean every part individually, making sure tiny passages and screens are free of debris. Keeping everything organized helps you reassemble the carburetor smoothly and ensures your chainsaw runs efficiently after cleaning.
This methodical approach saves time and frustration in the long run. It’s definitely worth the extra effort!
Inspect the Metal Strainer Filter
Since the metal strainer filter traps dirt and debris from fuel before it reaches your chainsaw’s engine, you need to inspect it carefully for clogs or damage that could restrict fuel flow. Locate the small mesh screen inside the carburetor, and check it closely for dirt buildup or any signs of damage.
Make sure the filter sits level with the plastic carburetor body to guarantee proper filtration. You can gently poke through the filter or carefully remove it to examine for blockages or accumulated debris.
Performing this inspection regularly helps maintain ideal carburetor function and keeps your engine running smoothly. Don’t skip this step, as a clogged or damaged filter can lead to poor fuel delivery and reduced chainsaw performance.
Clean the Filter and Carburetor Passages
Now that you’ve inspected the filter, it’s time to remove any debris stuck inside it and the carburetor passages. Use carburetor cleaner and a brush to clear out all buildup thoroughly.
When you’re done, reinstall the filter carefully to guarantee proper fuel flow and reliable operation. This step really helps keep things running smoothly!
Inspect Filter Condition
How can you be sure your chainsaw runs smoothly? Start by inspecting the metal strainer filter inside the carburetor. Carefully remove it from its housing without damaging nearby parts.
Check for dirt, debris, or blockages that could restrict fuel flow. Gently poke or prod the filter to loosen any trapped buildup. Then, spray it thoroughly with carburetor cleaner or compressed air to remove all residue.
Before reinserting, confirm the filter is completely clean and free of obstructions. Make sure it sits level with the carburetor body to maintain proper function.
Taking these steps ensures your chainsaw’s fuel system stays clear, helping it run efficiently and reliably every time you use it.
Remove Debris Thoroughly
After you’ve inspected and cleaned the metal strainer filter, the next step is to remove any remaining debris from both the filter and the carburetor passages. Carefully remove the filter from the carburetor to access trapped dirt.
Use a small tool to poke through the filter gently, loosening stubborn gunk. Then, spray the filter and passages with carb cleaner or blast them with compressed air to flush out all residue. Make sure every passage and the filter are completely clear before moving on.
To remove debris thoroughly:
- Use a small pick or needle to dislodge dirt stuck in the filter mesh.
- Spray carb cleaner liberally into all carburetor passages.
- Blow compressed air through each passage to ensure no blockage remains.
This step makes sure you get ideal fuel flow and smooth engine performance.
Reinstall Filter Correctly
Before reinstalling the metal strainer filter, make sure it’s completely clean and free of debris. This guarantees smooth fuel flow.
You’ll want to place the filter gently into the carburetor, pressing it down with your thumb until it sits level with the surrounding plastic body. Don’t force it in—forcing can damage both the filter and carburetor passages.
Take your time to ensure the filter is securely and evenly seated. This prevents any blockages or uneven fuel flow.
After placing it, double-check that the filter is properly aligned and flush with the carburetor’s surface. Doing this helps maintain ideal carburetor performance.
It also ensures your chainsaw runs efficiently without fuel delivery issues. Proper reinstallation is key to a clean, well-functioning carburetor.
Use Carburetor Cleaner Spray Effectively
When you spray carburetor cleaner, aim directly at the internal parts like jets and passages to dissolve stubborn gunk effectively. Make sure your chainsaw’s engine is off and cool before you start to avoid any risk of fire or burns.
Hold the spray can upright and use short bursts to prevent damage from excess pressure. Spray generously to reach every tiny orifice inside the carburetor. After spraying, let the cleaner sit for a few minutes so it can loosen deposits before you proceed.
Keep these tips in mind for best results:
- Target jets and tiny passages for thorough cleaning.
- Use short bursts, never a continuous spray.
- Allow cleaner time to work before wiping or reassembling.
Rinse and Dry All Parts Thoroughly
Though cleaning removes most grime, you’ll still need to rinse the carburetor parts with clean, running water to wash away any leftover debris or cleaner residue. After rinsing, wipe each part with a clean, lint-free cloth to remove water spots and surface moisture.
Next, use compressed air to blow dry all components thoroughly, paying special attention to tiny passages and the float bowl to ensure no moisture remains. Avoid using heat sources like hairdryers, as excessive heat can warp or damage delicate parts.
Finally, let all parts air dry completely for at least 30 minutes to prevent corrosion or engine performance issues caused by residual moisture. Taking these steps ensures your carburetor stays clean and functions smoothly.
Reassemble the Carburetor Carefully
After ensuring all parts are completely dry, you can start reassembling the carburetor. Begin by aligning the metal strainer filter properly, making sure it sits level with the carburetor body.
Gently press it into place with your thumb, avoiding any force that might damage it. Next, double-check the placement of gaskets and diaphragms to prevent air leaks and ensure smooth operation.
When securing screws and fittings, tighten them gradually in a cross pattern to avoid uneven pressure or over-tightening.
Keep these tips in mind:
- Confirm the filter is flush with the plastic body for proper fuel flow.
- Handle delicate parts gently to prevent damage.
- Always verify gasket and diaphragm alignment before final tightening.
Taking these careful steps ensures your carburetor functions correctly. Just take your time, and you’ll be good to go!
Reinstall the Carburetor on the Chainsaw
Now that the carburetor is clean and reassembled, carefully align it with the mounting studs and gasket on your chainsaw. Secure the mounting bolts evenly to create a tight seal without over-tightening.
Then, reconnect the fuel lines and linkages. Make sure everything moves freely and fits correctly. Just take your time to double-check each connection so the chainsaw runs smoothly.
Align Carburetor Properly
When you reinstall the carburetor on your chainsaw, make sure it aligns perfectly with the mounting flange to prevent leaks. Proper alignment is vital to maintain an airtight seal and ensure your saw runs smoothly.
Position the gasket correctly between the carburetor and the intake manifold before securing it. Also, check that the throttle and choke linkages connect properly and move freely to avoid operational issues.
Keep an eye on the carburetor’s orientation—it should match the original setup for proper fuel flow.
Remember these key points:
- Place the gasket properly to seal the connection.
- Align the carburetor with the mounting flange without forcing it.
- Confirm throttle and choke linkages operate smoothly after installation.
Secure Mounting Bolts
Once you’ve aligned the carburetor and confirmed the throttle and choke linkages move freely, focus on securing the mounting bolts. Start by cleaning the bolts to remove any debris.
Use a torque wrench to tighten them evenly to the manufacturer’s specs. Just be careful not to over-tighten, since that could cause damage.
Check for proper sealing and alignment once all bolts are secured. Also, take a moment to inspect the carburetor body for any cracks or leaks before moving on.
| Step | Detail |
|---|---|
| Clean bolts | Remove dirt and debris |
| Use torque wrench | Tighten to specified torque |
| Even tightening | Prevent misalignment |
| Avoid over-tightening | Prevent cracks or stripped threads |
| Final inspection | Check for leaks or misalignment |
Connect Fuel and Linkages
Before reattaching the carburetor, align its mounting holes carefully with the chainsaw’s intake manifold to guarantee a proper fit. Once aligned, reconnect the fuel lines to the carburetor’s inlet and outlet ports to prevent leaks.
Then, reattach the linkage gears and throttle cables, ensuring they move smoothly without binding. Don’t forget to secure the primer bulb and choke connections for proper operation.
Finally, tighten all mounting screws evenly to avoid warping or air leaks.
Remember to:
- Connect fuel lines firmly to avoid leaks
- Attach linkage gears and throttle cables so they move freely
- Secure primer bulb and choke connections properly
These steps ensure your chainsaw runs smoothly after cleaning.
Adjust Carburetor Settings for Optimal Performance
Although adjusting the carburetor settings requires patience, you’ll guarantee your chainsaw runs smoothly and efficiently by fine-tuning each screw carefully.
Start with the idle screw—turn it clockwise to increase engine speed or counterclockwise to slow it down, ensuring smooth idling.
Next, adjust the low-speed mixture screw slowly; clockwise leans the mixture, while counterclockwise enriches it, helping you achieve *best* throttle response.
Set the high-speed screw according to the manufacturer’s specifications found in your manual to maximize power without overheating.
Use a tachometer to confirm your chainsaw runs within the recommended RPM range after adjustments.
Remember to make small, incremental changes and test performance after each to avoid over-adjusting and maintain the proper fuel-air mixture for peak performance.
Frequently Asked Questions
Can I Use Carb Cleaner on a Chainsaw?
Yes, you can use carb cleaner on your chainsaw. Just spray it carefully into the carburetor intake, following instructions.
It dissolves buildup and improves performance. But make sure to avoid harsh chemicals that might damage delicate parts inside.
How Do You Adjust a Carburetor on a Chainsaw?
To adjust your chainsaw carburetor, start by turning the low-speed and idle screws to set the idle. Then, tweak the high-speed screw for power.
Take it slow—you don’t want to rock the boat with big changes! Adjusting little by little is the way to go.
Can I Spray Carb Cleaner Into the Air Intake?
You can spray carb cleaner into the air intake for a quick fix, but it won’t deep clean.
Be careful not to overdo it, or you might damage the air filter or other parts.
It’s a handy trick for a quick tidy-up, but for a thorough cleaning, you’ll need something more detailed.
How to Clean Your Carburetor?
Oh, sure, just toss your carburetor in the trash!
Or, you could carefully dismantle it, clean every part with carb spray or ultrasonic cleaner.
Check filters, then reassemble and adjust settings for smooth chainsaw running.
Conclusion
Now that you’ve breathed new life into your chainsaw’s carburetor, imagine it roaring back to life with effortless power. As you tighten the last screw and hear the engine hum smoothly, you’ll feel the satisfaction of a job well done.
With clean parts and fine-tuned settings, your chainsaw’s ready to tackle any task, slicing through wood like a hot knife through butter. Keep this routine, and your trusted tool will never let you down.
Regularly cleaning your chainsaw carburetor not only boosts performance but also extends the life of your saw. Taking these easy steps ensures your chainsaw runs efficiently and reliably every time you need it. So, keep up with this simple maintenance, and you’ll enjoy a powerful, smooth-running chainsaw season after season.