10 Steps to Test a Chainsaw Coil With a Multimeter
To test your chainsaw coil with a multimeter, start by disconnecting the spark plug wire and making sure the engine is cool. This step is crucial for safety before you dive in.
Next, gather your multimeter and set it to resistance mode—this will help you check the coil’s electrical properties.
Now, remove the spark plug and locate the ignition coil near the flywheel. Take a good look at the coil for any obvious signs of damage or wear.
Then, measure the resistance of the primary coil, which usually falls between 0.4 to 2 ohms.
After that, check the secondary coil’s resistance, typically ranging from 6,000 to 15,000 ohms.
Compare your readings to the manufacturer’s specs to see if the coil is functioning properly.
Finally, put everything back together and test for spark.
Following these simple steps can save you time and help accurately troubleshoot any ignition issues with your chainsaw.
Key Takeaways
- Disconnect the spark plug wire and turn off the cooled chainsaw for safety before testing the ignition coil.
- Remove the chainsaw cover and locate the ignition coil near the flywheel for clear access.
- Set the multimeter to the lowest resistance range (200Ω) to measure the primary coil resistance.
- Measure secondary coil resistance by connecting the multimeter between the high-voltage terminal and grounded engine point.
- Compare all resistance readings with manufacturer specifications to determine if the coil is faulty or functioning correctly.
Safety Precautions Before Testing
Before you begin testing the chainsaw coil, always disconnect the spark plug wire and turn off the chainsaw to prevent accidental starting. This essential safety precaution protects you from unexpected engine ignition.
Always disconnect the spark plug wire and turn off the chainsaw before coil testing to avoid accidental starts.
Make sure the chainsaw has cooled down for at least 10 minutes to avoid burns and get accurate readings. Wear insulated gloves to shield yourself from any residual electrical charge and avoid contact with high-voltage parts.
Work in a well-ventilated, clutter-free area, keeping children and pets away to maintain a safe environment. Before using your multimeter, set it to the correct resistance range and review the manufacturer’s specified values for your coil.
Following these safety precautions guarantees you test the chainsaw coil effectively and safely without risking injury or equipment damage.
Gather Required Tools and Equipment
Once you’ve taken the necessary safety steps, gather the tools and equipment needed for testing your chainsaw coil. You’ll need a digital multimeter set to resistance mode, typically 200Ω or higher.
Make certain you have insulated probes or alligator clips to connect securely to the coil terminals without damage. Double-check your multimeter leads are correctly inserted and zero the meter if needed.
Below is a quick reference table for essential items:
| Tool/Equipment | Purpose | Notes |
|---|---|---|
| Digital Multimeter | Measure coil resistance | Set to 200Ω or higher |
| Insulated Probes | Connect multimeter to terminals | Prevent connector damage |
| Wiring Diagram | Identify coil terminals | Helps locate primary/secondary |
| Safety Gloves | Protect hands | Optional but recommended |
Having these ready will help you accurately test the coil’s resistance.
Remove the Spark Plug and Disconnect Wiring
Before you start testing, make sure the engine is cool. Then, remove the spark plug to prevent accidental firing.
Next, disconnect the wiring harness from the ignition coil. Be sure to keep track of how everything is connected.
Taking these safety steps helps safeguard you and ensures accurate testing results. It’s always better to be safe than sorry!
Spark Plug Removal
To access the ignition system safely, you’ll need to remove the spark plug using a spark plug socket or wrench and disconnect its wire to prevent accidental grounding or sparking during testing.
Before removal, inspect the spark plug for wear, fouling, or damage, as these issues can also affect engine performance. Make sure the engine is cool to avoid burns or damage while handling the spark plug and ignition coil components.
Once removed, place the spark plug in a safe, dry spot to avoid contamination or damage before reinstalling. Properly removing the spark plug guarantees you can accurately test the ignition coil with your multimeter without risking injury or inaccurate readings.
Wiring Disconnection Steps
Although you’ve removed the spark plug, you still need to disconnect the wiring connector from the ignition coil to isolate it for testing. First, make sure the engine is cool to avoid burns or damaging sensitive parts.
Carefully note or label each wiring connection so you can put everything back correctly later. It’s a good idea to use insulated tools here to keep things safe and prevent any electrical shorts or shocks.
Now, gently detach the wiring connector from the coil. Be careful not to damage the terminals while doing this.
Once the wiring is disconnected, the coil will be isolated. This lets you use your multimeter accurately to check resistance.
Taking these steps is really important for getting precise readings and diagnosing any coil problems effectively.
Safety Precautions Before Testing
Since testing a chainsaw coil involves handling electrical components, you need to remove the spark plug and disconnect the wiring to prevent accidental ignition and electrical shocks. Following vital safety precautions guarantees your multimeter readings are accurate and that you stay protected.
Before you start testing, make sure to remove the spark plug to avoid high voltage arcing and protect the coil from damage. Also, disconnect the spark plug wire to prevent the engine from accidentally igniting.
Turn off the chainsaw and ensure the ignition switch is in the off position. It’s important to wait for the engine and coil to cool down before you begin.
Don’t forget to use insulated gloves and tools. These steps are essential for your safety and for reliable multimeter measurements.
Locate the Ignition Coil on the Chainsaw
To locate the ignition coil, start by removing the chainsaw’s cover or side panel with a screwdriver or socket wrench.
The coil is usually mounted near the flywheel and connected to the spark plug wire.
If you’re unsure where to find it on your model, check your user manual. It’ll give you the exact location and make things easier.
Find Coil Location
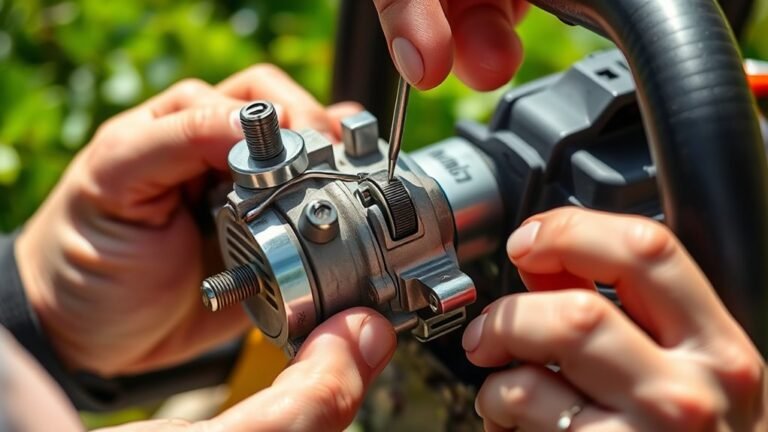
You’ll usually find the ignition coil beneath the chainsaw’s starter cover or housing, held in place by screws or bolts. The coil is often mounted directly on the engine’s cylinder, with a high-tension lead running to the spark plug.
To locate it, you’ll need to carefully remove the cover without damaging any wires or clips. Always take your time here to avoid any accidental damage.
Here’s what to keep in mind when finding the coil location:
- The coil is a small rectangular or cylindrical component with electrical terminals.
- It’s connected to the spark plug via a high-voltage lead.
- Consult your chainsaw’s manual for exact coil placement and wiring specifics.
Knowing this helps you identify the ignition coil quickly before testing it with a multimeter. Makes the whole process a lot smoother, trust me!
Remove Chainsaw Cover
Before you can test the ignition coil, remove the chainsaw’s outer cover by unscrewing the mounting screws and gently lifting it away. Make sure the chainsaw is turned off and cooled down to avoid injury.
Once the cover is off, locate the ignition coil near the flywheel; it connects to the spark plug wire. Carefully inspect the coil and its wiring for any visible damage, cracks, or burnt spots.
Before proceeding, disconnect the spark plug wire from the spark plug to prevent accidental arcing during your tests. Removing the cover gives you clear access to the coil, allowing you to perform accurate testing with your multimeter while keeping safety in mind throughout the process.
Inspect the Ignition Coil for Visible Damage
Starting with a close visual inspection reveals crucial clues about your chainsaw’s ignition coil condition. Before testing with a multimeter, carefully examine the ignition coil for any visible damage that could affect its performance.
Focus on these key areas: check for cracks, burns, or discoloration on the coil casing and mounting area, which might indicate potential damage or overheating. Also, inspect the coil terminals and connections for corrosion, buildup, or loose wires that may disrupt electrical flow.
Look for epoxy cracks or chips on the coil housing, too. These often signal internal deterioration you don’t want to overlook.
Additionally, make sure the coil is securely mounted with tight, rust-free screws. This visual inspection helps you spot obvious defects early on, saving time and preventing misdiagnosis before you move on to electrical testing.
Set Your Multimeter to the Correct Resistance Range
Although it might seem straightforward, setting your multimeter to the correct resistance range is essential for accurate coil testing. Start by selecting the lowest resistance range on your multimeter, usually 200 ohms, to measure the primary coil’s low resistance accurately.
When testing the secondary winding, switch to a higher range, like 20,000 ohms, to avoid overloading your multimeter and get precise readings. Before measuring, verify your multimeter works correctly by testing it on a known resistor.
Remember to always turn off the engine and disconnect the spark plug wire to prevent electrical shock or false readings. Choosing the appropriate resistance range helps you detect open circuits or shorts in the coil windings effectively.
Measure the Primary Coil Resistance
First, find the two primary terminals on your ignition coil. They’re usually connected to the ignition switch or trigger wiring.
Next, set your multimeter to the lowest resistance range, typically 200Ω. This helps you get an accurate reading.
Then, firmly place the probes on each terminal to measure the primary coil resistance. It’s pretty straightforward once you get the hang of it!
Locate Coil Terminals
When you remove the chainsaw’s cover to access the ignition coil near the flywheel, you’ll want to identify the two primary terminals connected to the ignition and kill switches. These terminals are vital for measuring the primary coil resistance accurately.
To locate and test them effectively, follow these steps:
- Spot the ignition coil near the flywheel after removing the housing.
- Find the two primary terminals, usually linked to the ignition and kill switches.
- Prepare your multimeter probes to connect firmly to these terminals for a reliable reading.
Once you’ve located the primary terminals on the coils, you can proceed to measure resistance. This will help you determine if the coil is functioning correctly or if it needs replacement.
Use Correct Multimeter Setting
To measure the primary coil resistance accurately, you’ll want to set your multimeter to the lowest resistance range, usually 200 ohms. This setting guarantees precise readings when checking the coil’s primary winding.
Before testing, turn off the ignition and disconnect the coil from the spark plug and wiring to avoid false readings or damage. Next, identify the two primary terminals on the ignition coil—these are often marked or detailed in your service manual.
Connect your multimeter probes firmly to these terminals, making sure they don’t touch other components. A healthy primary coil resistance typically falls between 0.4 ohms and 2 ohms.
If your multimeter shows noticeably higher or lower resistance, the coil may be faulty and need replacement. It’s always better to double-check to be sure!
Measure the Secondary Coil Resistance
Although measuring the secondary coil resistance requires careful handling, you can easily check it by connecting your multimeter’s positive lead to the ignition coil’s high-voltage terminal and the negative lead to a grounded engine point.
Before testing, make sure the ignition switch is off and the spark plug wire is disconnected to avoid shocks. Safety first, right?
When measuring, keep in mind:
- Typical resistance ranges from 6,000 to 15,000 ohms depending on the chainsaw model.
- A high reading may indicate coil damage or corrosion.
- A very low reading suggests a shorted secondary winding.
Compare Resistance Readings to Manufacturer Specifications
Two key resistance measurements—the primary and secondary coil readings—must match your chainsaw’s service manual specifications to guarantee proper ignition coil function.
After measuring, compare the resistance values to the manufacturer’s ranges. If both readings fall within these limits, the coil is good.
Significant deviations may indicate internal damage like shorts or open circuits, signaling a faulty coil.
| Measurement Type | Typical Resistance Range |
|---|---|
| Primary Coil | 0.4 – 2 ohms |
| Secondary Coil | 6,000 – 15,000 ohms |
Use your chainsaw’s manual to confirm exact numbers. Matching resistance values ensure your ignition coil operates correctly.
If the values fall outside these ranges, it means replacement is necessary.
Reassemble the Chainsaw and Perform a Spark Test
Once you’ve finished inspecting or replacing the ignition coil, reassemble your chainsaw by securely fastening the engine cover and tightening all screws to prevent any loose parts. Next, reconnect the spark plug wire firmly to ensure solid contact.
Before testing, switch the chainsaw to “on” and engage the chain brake for safety. Use a spark tester to check the coil’s performance by holding it against the spark plug wire while pulling the starter cord.
Look for a strong, consistent spark across the tester gap. If the spark is weak or missing, further coil troubleshooting or replacement is needed.
A strong, consistent spark indicates a healthy coil; weak or no spark means further troubleshooting or replacement is necessary.
- Secure engine cover and fasten screws tightly
- Reattach spark plug wire firmly
- Use a spark tester to verify coil spark strength
Frequently Asked Questions
How Do I Know if My Chainsaw Coil Is Bad?
You’ll know your chainsaw coil is bad if the primary resistance reads below 0.4 ohms or the secondary winding shows infinite resistance.
Even normal readings can be misleading if there’s internal damage, which might cause failures during use.
How to Tell if a Coil Is Bad With a Multimeter?
Think of your coil as a heartbeat—if your multimeter reads zero or infinite resistance, it’s skipping beats.
You’ll know it’s bad when those numbers stray far from specs, signaling a faulty or broken coil.
How to Test a 2 Stroke Ignition Coil?
You test a 2-stroke ignition coil by measuring its primary resistance between terminals. Then, check the secondary resistance from a terminal to the spark plug lead.
Compare the readings to the specs. If you get zero or infinite resistance, it means the coil’s faulty.
Can I Test the Ignition Coil on My Chainsaw Using a Screwdriver?
Don’t let frustration spark from guessing—no, you can’t properly test your chainsaw’s ignition coil with just a screwdriver.
You’ll need a multimeter to measure resistance and get the true pulse of your coil’s health.
Conclusion
Now that you know how to test your chainsaw coil with a multimeter, you’re better equipped to keep your tool running smoothly. Did you know that ignition coil failures cause up to 30% of small engine problems? By regularly checking the coil’s resistance, you can catch issues early and avoid costly repairs.
Follow these steps carefully, and you’ll guarantee your chainsaw starts reliably every time you need it. Staying on top of maintenance like this not only saves you money but also keeps your chainsaw performing at its best.
Remember, testing your chainsaw coil with a multimeter is a simple yet effective way to troubleshoot ignition issues. So, keep your equipment in top shape, stay safe, and enjoy the peace of mind that comes with knowing your chainsaw will fire up whenever you need it.