How to Tighten a Chainsaw in 10 Easy Steps
To tighten your chainsaw, first gather all the necessary tools and safety gear. Make sure the chainsaw is turned off and completely cooled down before you start working on it.
Next, remove the safety cover to access the chain. Loosen the nuts holding the guide bar so you can adjust the chain tension easily. Find the tension screw, which is usually located on the side of the chainsaw near the guide bar.
Turn the tension screw clockwise to snug the chain up. Be careful not to tighten it too much.
After that, do a snap-back test to check the chain tension. Rotate the chain by hand to make sure it moves smoothly without too much slack.
Finally, tighten the nuts securely to lock the guide bar in place. Recheck the chain tension one last time to ensure it’s safe to use.
Follow these simple steps closely, and your chainsaw will be running smoothly and safely in no time!
Key Takeaways
- Turn off the chainsaw, disconnect power, and wait 10-15 minutes for it to cool before starting adjustments.
- Remove the safety cover by unscrewing bolts to access the chain and guide bar safely.
- Loosen the guide bar nuts slightly using a wrench while supporting the bar to prepare for tension adjustment.
- Turn the chain tension screw clockwise to tighten the chain until it fits snugly without sagging.
- Re-tighten the guide bar nuts securely, then check chain movement and perform a snap-back test for proper tension.
Gather Necessary Tools and Safety Gear

Before you start tightening your chainsaw, gather the right tools and safety gear to work efficiently and protect yourself. You’ll need a screwdriver or wrench that fits the nuts securing the guide bar on your specific model.
Wearing safety gloves and eye protection is essential to prevent injury from sharp chain edges or flying debris during chain tension adjustment. Also, prepare a clean, flat surface to support the chainsaw, making it easier to handle while you work.
Keep your owner’s manual nearby to check precise instructions for adjusting the chain tension. Locate the adjustment screw, which controls how tight the chain sits on the guide bar.
Having these tools and protective gear ready guarantees a smooth, safe process when you tighten your chainsaw’s chain tension. It really helps to be prepared before you dive in!
Ensure the Chainsaw Is Turned off and Cooled Down

Since your safety depends on it, always turn off the chainsaw and disconnect its power source or remove the battery before starting any maintenance. This step prevents accidental activation and guarantees you’re working safely.
Next, allow the chainsaw to cool down completely—wait at least 10 to 15 minutes after use. Handling a cooled-down chainsaw reduces the risk of burns from hot components and prevents damage to the chain and bar during tensioning.
Never attempt to tighten or adjust the chain while the chainsaw is still hot, as heated parts can be fragile or unsafe to handle. Ensuring the chainsaw is both off and cooled down sets the foundation for a safe, effective tensioning process without risking injury or equipment damage.
Remove the Safety Cover for Access to the Chain

Once you’ve confirmed the chainsaw is off and cooled, you can remove the safety cover to access the chain. Locate the screws or bolts securing the safety cover near the chain guide.
Use the correct screwdriver or wrench to carefully unscrew them, and keep the screws safe for later. Gently lift the safety cover away, avoiding damage to the chainsaw chain or other parts.
With the cover off, you’ll have clear access for adjustments. Easy, right? Just take it slow and steady.
| Step | Tip |
|---|---|
| Confirm power off | Prevent injury by double-checking |
| Locate screws | Usually near the chain guide |
| Unscrew carefully | Use the right tool for each screw |
| Remove safety cover | Lift gently to avoid chain damage |
Loosen the Nuts Securing the Guide Bar
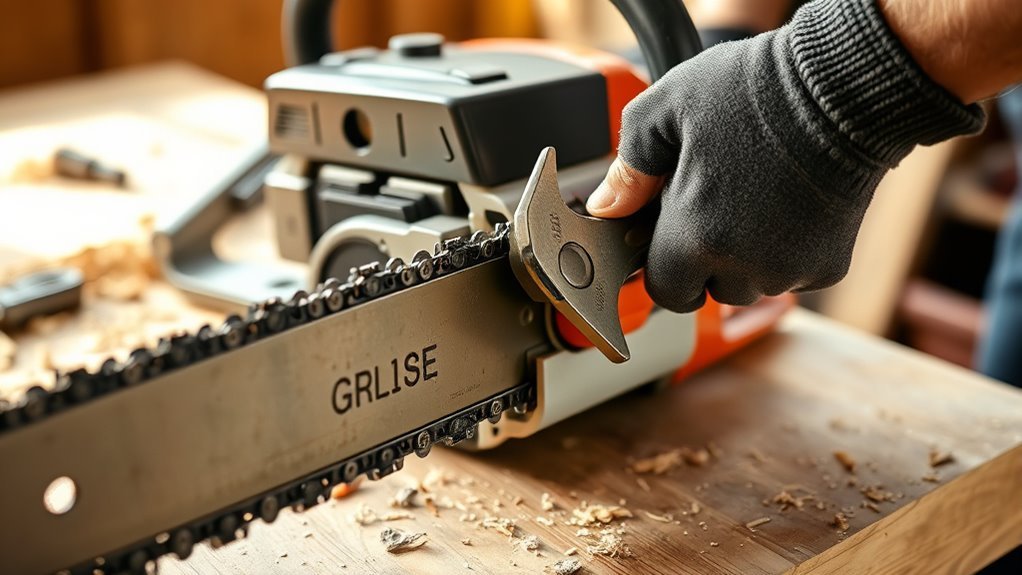
First, find the nuts securing the guide bar on the side of your chainsaw. Use the right wrench to loosen them carefully, keeping a hand on the bar to steady it.
Loosen just enough so you can adjust the chain tension without removing the nuts completely. This way, the bar stays in place while you work.
Locate Bar Nuts
Before you can adjust the chain tension, you’ll need to locate the bar nuts on the side of your chainsaw. These nuts are usually located securing the guide bar, holding it firmly in place.
Use a wrench or socket tool to find them easily; they’re positioned where the bar meets the body of the saw. Loosening these nuts slightly allows you to move the guide bar and adjust the chain tension properly.
Make sure the chain’s drive links fit well into the guide bar groove as you work. Be sure not to remove the nuts completely unless you want to detach the entire guide bar.
Loosen the nuts just enough to move the bar freely without damaging the threads. This step guarantees the chain will be tightened correctly.
Loosen Nuts Safely
After locating the bar nuts that hold the guide bar in place, you’ll want to loosen them carefully using a wrench or socket, turning counterclockwise until they’re free. Make sure the chainsaw is off and cooled down for safety.
Support the bottom of the guide with one hand to prevent slipping. Loosen all nuts evenly to avoid misalignment when adjusting later. Keep the nuts safe for re-tightening.
| Step | Tip |
|---|---|
| Use proper tools | Wrench or socket |
| Direction to turn | Counterclockwise to loosen |
| Support guide bar | Hold bottom of the guide |
| Handle nuts | Loosen evenly, keep safely |
Prepare Bar Adjustment
When you’re ready to adjust the chain tension, loosen the nuts securing the guide bar using a wrench or the appropriate tool. Turn them counterclockwise just enough to release the tension without removing them completely.
This slight loosening lets the guide bar move freely, making it easier to tighten or loosen the chain as needed. Always make sure your chainsaw is turned off and cooled down before you start working on it to avoid accidents.
Keep the nuts nearby in a safe place so you can easily tighten them back once the adjustment is done. Try not to fully remove the nuts, as this can complicate the process or lead to losing small parts.
Properly preparing the bar this way helps ensure a smooth and safe chain adjustment. It’s a simple step, but it makes all the difference!
Locate the Chain Tension Adjustment Screw
Where exactly do you find the chain tension adjustment screw on your chainsaw? Typically, it’s located in the center of the nuts that secure the guide bar to the chainsaw.
Look near the guide bar area for a small screw with either a slotted or hexagonal head. This is the chain tension adjustment screw. Identifying it correctly is vital because this screw controls how tight or loose your chain sits on the bar, affecting safety and performance.
If you’re unsure, consult your chainsaw’s owner’s manual to confirm the exact location and type of screw for your specific model. Once you’ve located it, you’ll be ready to proceed with adjusting the chain tension properly.
Adjust the Chain Tension by Turning the Screw
Although locating the chain tension adjustment screw is essential, you’ll now need to turn it to tighten the chain. Find the screw near the center of the guide bar or on the side of your chainsaw.
Turn it clockwise to tighten the chain until it feels snug but can still move freely. Hold the guide bar up and apply slight pressure; the chain should lift slightly out of its groove as you adjust.
After tightening, recheck the tension to avoid over-tightening, which can damage the chain or bar. Finally, don’t forget to securely tighten the bar nuts to lock in the proper tension.
This ensures your chainsaw operates smoothly and safely during use. Easy, right? Just take it step by step!
Perform the Snap-Back Test to Check Tension
Before you start cutting, perform the Snap-Back Test to guarantee your chainsaw chain has the right tension. Simply pull the chain away from the guide bar at the midpoint and release it.
A properly tensioned chain should snap back quickly and fit snugly against the bar without sagging.
Here’s what to look for during the test:
- The chain has just enough slack to be pulled slightly away without excessive looseness.
- It snaps back to its original position quickly and smoothly.
- If it remains loose or sags considerably, you need to tighten the chain.
Regularly performing this test ensures your chainsaw operates safely and efficiently. It helps prevent accidents caused by a loose chain.
Rotate the Chain to Confirm Smooth Movement
Now, rotate the chain by hand to check for smooth movement along the guide bar. If you feel any resistance or binding, the chain might be too tight or misaligned.
Make sure the chain moves consistently without sticking before you finish adjusting. It’s important to get this right so everything runs smoothly.
Check Chain Rotation Smoothness
When you rotate the chain manually around the guide bar, you want to make certain it moves smoothly without any resistance or sticking. This guarantees your chainsaw is properly tensioned and ready for safe use.
To check the chain rotation smoothness, focus on these key points:
- Confirm the chain spins freely with minimal effort, indicating correct tension.
- Make sure the drive links stay engaged in the bar groove to avoid slipping or derailment.
- Perform a snap-back test by pulling the chain slightly away; it should quickly return to a snug position.
If the chain moves smoothly through these checks, your adjustment is on point. This step is vital before moving on to identifying any resistance or binding issues.
Identify Resistance or Binding
How can you tell if your chainsaw chain is too tight or binding? First, rotate the chain manually around the guide bar. It should move smoothly without sticking or resistance.
If you need to use extra force to turn the chain, it’s likely too tight. Listen closely for any squeaking or grinding sounds—these noises often mean the chain is binding against the bar.
Make sure the chain stays properly engaged in the guide bar groove during rotation and doesn’t slip off. You should also be able to pull the chain slightly away from the bar; it should snap back into place easily without resistance.
If you notice any of these issues, your chain tension needs adjustment to prevent damage and ensure safe operation. It’s a simple check that can save you a lot of trouble down the line!
Ensure Consistent Chain Movement
Although you’ve adjusted the tension, you should rotate the chain manually to confirm it moves smoothly around the guide bar without sticking or hesitation. This step guarantees your chainsaw operates safely and efficiently.
When you spin the chain, check for smooth, even rotation without wobbling or binding on the bar. Also, make sure it moves freely with minimal resistance around the guide bar.
Keep an eye on the drive links to see that they stay properly engaged in the bar groove throughout rotation. If you notice any resistance, binding, or uneven movement, readjust the tension and test again.
Confirming consistent chain movement before using the chainsaw prevents damage and improves cutting performance. Taking this simple but essential step guarantees your saw runs smoothly and safely every time you start it up.
Tighten the Nuts to Secure the Guide Bar and Chain
Since securing the guide bar and chain properly is essential, you’ll want to tighten the nuts evenly using a wrench. Start by tightening the nuts in a crisscross pattern to distribute pressure evenly and prevent warping the guide bar.
Make sure to apply firm pressure—but don’t over-tighten—to hold both the bar and chain securely in place. After tightening, check the guide bar for any movement or play to confirm the nuts are secure.
If the bar shifts, adjust the nuts accordingly. Properly tightened nuts keep the chain aligned and stable, ensuring safe and efficient operation.
Recheck Chain Tension and Movement Before Use
Before using your chainsaw, you’ll want to recheck the chain tension and movement to guarantee everything operates smoothly. Start by manually rotating the chain to make sure it moves freely without excessive resistance.
Then, pull the chain upward slightly; it should just touch the bottom of the guide bar, indicating proper tension. Also, ensure the chain doesn’t sag or slip off during movement.
Here are the key checks to perform:
- Confirm the chain moves smoothly and doesn’t stick.
- Perform a “snap-back” test by pulling the chain away from the bar; it should return snugly.
- Make sure the chain stays securely seated on the guide bar without slack.
Always recheck tension after tightening the nuts to keep your chainsaw safe and efficient. It’s a simple step but super important for smooth operation and your safety.
Frequently Asked Questions
How Do You Know if Your Chainsaw Chain Is Tight Enough?
You know your chainsaw chain’s tight enough when it just touches the bar tip as you lift it. It should snap back into place easily.
Also, it needs to rotate freely by hand and not sag or hang loosely during use. That way, you’re all set for safe and efficient cutting.
Why Do Loggers Run Chainsaw Bars Upside Down?
You might be surprised, but loggers run chainsaw bars upside down to improve balance and reduce fatigue during long jobs.
This trick also helps wear the bar evenly, extending its life and boosting cutting precision in tight spots.
Do I Cut Tension or Compression First?
You cut tension first before adjusting or re-tensioning the chainsaw chain. Loosening the tension initially helps you prevent damaging the bar or chain.
It also guarantees you can tighten it properly for safe, efficient operation. Taking this step makes the whole process smoother and safer.
How Do I Make My Chainsaw Easier to Start?
To make your chainsaw roar to life effortlessly, keep its spark plug and air filter clean. Use fresh fuel, and fully engage the choke when the engine is cold.
Then, pull the starter cord smoothly. Regular maintenance keeps it singing strong.
Trust me, a little care goes a long way in making your chainsaw easier to start and more reliable.
Conclusion
Now that you’ve tightened your chainsaw chain, imagine the thrill of cutting through wood with precision and safety. Like a well-tuned instrument, your chainsaw will roar smoothly, ready to tackle any task.
Remember, a properly tightened chain isn’t just about performance—it’s about keeping you safe and confident every time you work. So, keep these steps in mind, and your chainsaw will always be sharp, steady, and ready to roar.
By regularly checking and tightening your chainsaw chain, you not only improve cutting efficiency but also extend the life of your equipment. A tight chain reduces the risk of accidents and ensures smoother, more reliable operation.
So, whether you’re a beginner or a seasoned pro, mastering how to tighten a chainsaw chain is key to safe and effective woodcutting. Keep your chainsaw chain properly adjusted, and you’ll enjoy both safety and precision every time you start the saw.