

How to Read a Chainsaw Bar Step by Step
To read your chainsaw bar, start by locating any stamped numbers on the bar. These numbers usually show important details like the bar length, gauge, and model. This info is key to understanding what type of bar you have and what chain will fit.
Next, measure the bar length by going from the tip of the bar to where it enters the saw body. Make sure not to include the sprocket nose in your measurement. Accuracy here matters because it affects chain compatibility.
You’ll also want to check the groove width with a calipers tool to find out the gauge size. Then, count the drive links on your chain to ensure it matches the bar correctly.
Matching all these specs carefully helps avoid fit issues or safety problems down the line.
Stick around for tips on how to read older chainsaw bars and how to dodge common mistakes when identifying your bar specs. It’s easier than you might think once you know what to look for!
Key Takeaways
- Locate and interpret stamped or engraved markings indicating bar length, gauge, and model numbers on the chainsaw bar. These markings give you the basic info you need about the bar.
- Measure the bar length accurately from the tip to the point it enters the saw body, excluding the sprocket nose. This ensures you get the exact length for replacement or compatibility.
- Identify the bar gauge by checking stamped numbers or measuring groove width with a caliper for drive link compatibility. This step is key to making sure your chain fits perfectly.
- Confirm the chain pitch and gauge match the bar specifications to ensure proper fit and safe operation. Mismatched chains can cause issues or even be dangerous.
- Cross-reference markings with manufacturer specifications and use a manual or guide to verify bar and chain compatibility. It’s always a good idea to double-check before making any changes.
Understanding Chainsaw Bar Numbers and Markings
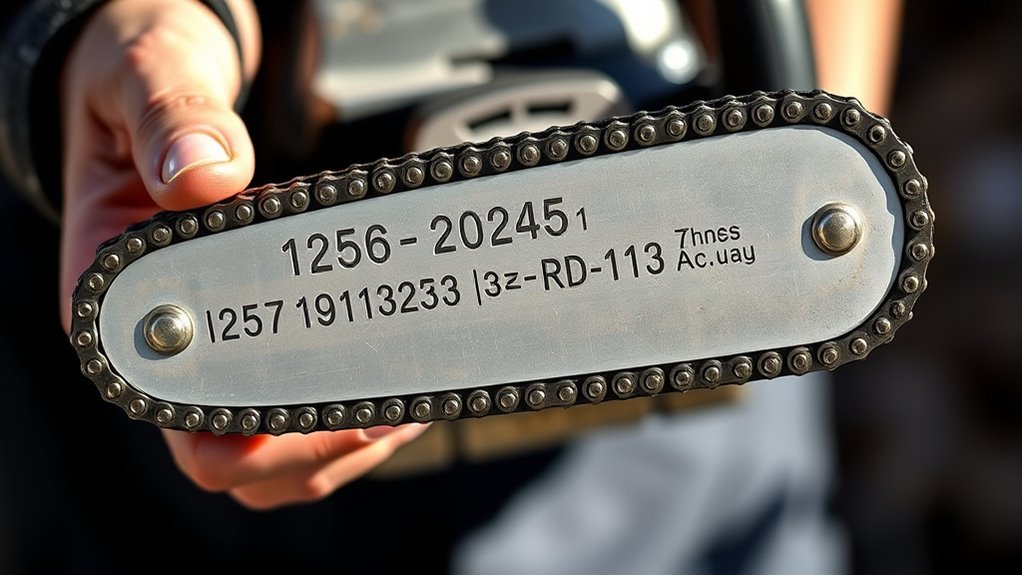
How can you quickly identify the right chainsaw bar for your saw? Start by examining the chainsaw bar numbers stamped or engraved on the bar itself. These numbers often include codes indicating the bar length or model series, such as the first digits like 608.
While these give clues, you might need to cross-reference to confirm the exact bar length. Alongside these, you’ll find additional numbers that usually represent manufacturing codes or serial numbers. These don’t directly specify gauge or drive links, though.
The gauge and drive links are essential for compatibility but might not be part of the visible numbers. Understanding these markings helps you pick the correct replacement bar without guesswork. That way, your saw runs smoothly and safely.
Measuring Chainsaw Bar Length Accurately

Although it might seem straightforward, measuring your chainsaw bar length accurately takes some care to guarantee a proper fit. The chainsaw bar length refers to the maximum cutting capacity, not the entire bar’s physical size.
To ensure accuracy, follow these key steps:
- Measure from the tip of the guide bar to where it enters the saw’s body, excluding the sprocket nose or mounting hardware.
- Use a tape measure or ruler, keeping the bar flat and level to avoid skewed measurements.
- Round your measurements to the nearest inch or half-inch for standard sizing.
- Double-check if the marked length on the bar matches your measurements for compatibility.
Following this approach guarantees you get precise chainsaw bar length measurements every time. It’s really all about taking your time and being consistent.
Identifying Bar Groove Gauge and Its Importance

Because the bar groove gauge controls the chain’s fit, you need to identify it accurately to guarantee smooth and safe chainsaw operation.
The groove gauge, also called the drive link width, determines which chain size fits your bar groove properly. You can find the groove gauge stamped on the bar or measure it with a caliper by sliding it into the bar groove at its narrowest point.
Common groove gauges include .043, .050, .058, and .063 inches, each matching specific chain sizes. Using the wrong groove gauge causes chain derailment, excessive wear, or damage to both the chain and bar.
Recognizing Common Chainsaw Bar Specifications
Where can you find the key information about your chainsaw bar’s size and compatibility? Look closely at the stamped or engraved numbers on the bar itself. These markings reveal essential specs like bar length, gauge sizes, drive links, and mounting style.
Here’s what to check:
Key details to verify include bar length, gauge size, drive links, and mounting style.
- Bar length: Usually shown in inches (e.g., 16″, 20″) indicating the cutting surface size.
- Gauge sizes: Represent the thickness of the drive links, often in millimeters or thousandths of an inch (e.g., .050).
- Drive links: You’ll find the exact count or type compatible with the bar groove.
- Mounting style: The first digits often specify the mounting type or model number, essential for fitting your chainsaw correctly.
Matching Chainsaw Bars With Compatible Chains
You need to make certain the chain pitch matches your bar’s pitch exactly, as even a slight difference can cause problems. Check the chain gauge to ensure it fits snugly in the bar’s groove, and count the drive links to match the bar’s specifications.
These steps are key to keeping your chainsaw running safely and efficiently. Taking a little extra time here can save you from headaches later on.
Chain Pitch Importance
How do you guarantee your chainsaw runs smoothly and safely? It all starts with understanding the chain pitch. This measurement, the distance between centers of three consecutive rivets divided by two, determines if your chain fits perfectly into the guide groove of the bar.
Matching chainsaw bars with compatible chains means selecting the right chain size based on this pitch. Here’s what to keep in mind:
- Chain pitch commonly comes in 1/4″, 3/8″, .325″, and 3/8″ low profile.
- The chain pitch must match the bar’s stamped or measured pitch.
- A mismatched chain pitch causes binding, increased wear, or derailment.
- Always measure accurately with a caliper before buying a chain.
Gauge Compatibility Check
Although chain pitch guarantees the chain fits lengthwise, the bar gauge must correspond with the chain’s drive link thickness for proper fit. Gauge compatibility is essential because the bar groove width needs to match the chain gauge, usually marked on both the bar and chain, like .050 or .058 mm.
To check, measure the bar groove with a caliper and compare it against the drive links’ thickness. Using a chain with a gauge too thick for the bar groove can cause excessive wear or derailment, while a too-thin gauge may result in slippage.
Always verify manufacturer markings and specs before installation. Ensuring proper gauge compatibility optimizes cutting performance, reduces wear, and keeps your chainsaw operating safely and efficiently.
Drive Link Counting
When matching a chain to your chainsaw bar, counting the drive links accurately is crucial to guarantee a proper fit. The number of drive links directly affects chain length and compatibility, ensuring your chainsaw runs safely and efficiently.
Here’s how to approach counting: Lay the chain flat on a surface and count each drive link carefully, ideally in pairs for accuracy. Use gloves to avoid injury and prevent miscounts from overlapping or damaged links.
Compare the drive link count with the chain specifications or your chainsaw manual. Make sure the count matches the bar length and saw requirements to avoid chain derailment or tension issues.
Accurate counting ensures the chain length fits perfectly. This helps maintain excellent compatibility between the bar and chain, so your saw works just right.
Counting Drive Links for Proper Chain Fit
To guarantee your chain fits properly, start by counting the drive links carefully while the chain lies flat. Always verify this count against the number specified in your chainsaw manual or stamped on the bar.
Getting this right helps prevent chain derailment and keeps your saw running smoothly. So, take your time with this step—it really makes a difference!
Counting Drive Links
Since the drive links determine how well your chain fits the bar, you’ll want to count them carefully by laying the chain flat with the links facing up. This guarantees an accurate chain count that matches your bar specifications and guarantees a proper chain fit.
Here’s how to do it right:
- Wear gloves to protect your hands from sharp edges while handling the chain.
- Lay the chain flat on a clean surface with drive links facing upward.
- Count the drive links slowly, preferably in pairs, to avoid mistakes.
- Compare your count with the bar specifications or your saw’s manual to confirm compatibility.
Following these steps helps prevent chain derailment and ensures safe, efficient operation of your chainsaw.
It’s a simple process, but taking your time really pays off. You’ll avoid headaches and keep things running smoothly!
Drive Link Verification
Counting the exact number of drive links on your chainsaw chain guarantees it fits properly into the bar groove. To verify, lay the chain flat and carefully count each drive link—the lower sections that fit into the guide bar’s groove.
For longer chains, count links in small groups or pairs to avoid mistakes. Always compare your counting links result with the specifications found in your saw’s manual or on the bar markings.
This step ensures the chain fit is accurate, preventing derailment, excessive wear, or tension issues. Remember to wear gloves while handling the chain for safety.
Proper drive link verification is essential for reliable and secure chainsaw operation every time you use it.
Tips for Reading Older or Unmarked Bars
Although older or unmarked chainsaw bars might lack clear specifications, you can still identify their size by measuring the length from the tip to the mounting point with a tape measure. When dealing with unmarked bars, rely on careful measurements and inspection to determine key details.
Here’s how to proceed:
- Measure the bar length precisely to match it with standard sizes.
- Use a caliper to check the groove width, which helps identify the chain gauge.
- Count the drive links on the chain or refer to your chainsaw’s manual for compatibility.
- If markings are unclear, use the stamped numbers to consult manufacturer catalogs or contact suppliers for accurate identification.
These steps ensure you correctly read older or unmarked bars without guesswork. It might take a bit of patience, but it’s definitely doable!
Avoiding Common Mistakes When Reading Bar Information
When you read bar information, you need to verify stamped numbers carefully and cross-reference them with manufacturer catalogs to avoid mistakes. Don’t rely solely on markings like “92770 TQ,” which don’t indicate size or gauge.
Instead, focus on numbers related to length, pitch, gauge, and drive links. If markings are unclear or missing, measure the bar length yourself, excluding non-cutting ends.
Always confirm the chainsaw chain’s pitch and gauge match the bar specifications using a caliper or gauge tool to prevent improper fit or damage. Double-check all measurements and markings against your saw’s manual or official guides.
Taking these steps ensures you select the right replacement bar and maintain ideal chainsaw performance without costly errors. It’s worth the extra effort to keep everything running smoothly!
Frequently Asked Questions
How to Read a Chainsaw Chain?
You read a chainsaw chain by checking its pitch, gauge, and drive links. Look for stamped markings on the chain, then match those specs with your bar and sprocket to guarantee a proper fit and safe operation.
It’s pretty straightforward once you know what to look for. Just take your time to compare those numbers carefully. That way, your chainsaw will work smoothly and safely every time.
What Does LP Mean on a Chainsaw?
LP on a chainsaw means Low Profile, indicating a thinner, narrower bar and chain designed for lighter cutting tasks.
You’ll find it on smaller, safer saws, perfect for pruning or residential use where maneuverability matters.
It’s all about making the saw easier to handle and control, especially if you’re working in tight spaces or doing less heavy-duty jobs.
Which Way Does a Chain Go on a Chainsaw Bar?
You’ll want the chain’s cutting teeth facing forward on the top side of the bar, moving away from you.
Make sure the drive links fit snugly in the groove for proper alignment and smooth cutting action. It’s important to double-check this so your chainsaw works safely and efficiently.
How to Buy a Chainsaw Chain?
You buy a chainsaw chain by matching the chain pitch, gauge, and number of drive links to your saw’s bar specifications.
Always choose the chain type that suits your cutting needs and follow manufacturer recommendations.
It’s pretty straightforward once you know what fits your saw. Just take your time to get the right match!
Conclusion
Now that you know how to read your chainsaw bar, you’re better equipped to maintain and replace it properly. Did you know that using the correct bar and chain combination can boost cutting efficiency by up to 30%? This not only saves time but also extends your saw’s lifespan.
So, take a moment to double-check those markings and measurements. You’ll work safer and smarter every time you pick up your chainsaw. Understanding how to read a chainsaw bar is essential for effective maintenance and optimal performance. With the right knowledge, you can avoid costly mistakes and keep your chainsaw running smoothly for years to come.


