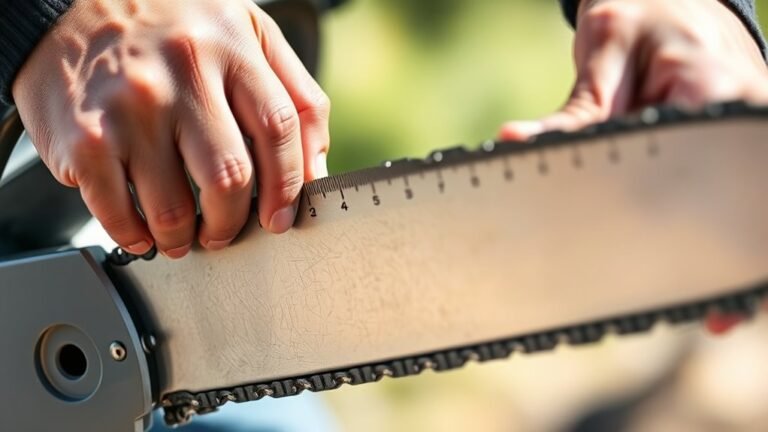
How to Do and Measure a Chainsaw Bar in 10 Easy Steps
First, make sure your chainsaw is powered off and safe by disconnecting the spark plug or battery. This step is crucial for your safety before you start any maintenance.
Next, loosen the chain tension and carefully remove the chain from the bar. This will give you clear access to measure and inspect the bar properly.
Check for stamped measurements on the bar heel to find pitch and gauge info. These markings are often subtle but important for accurate measurement.
Use calipers to measure chain pitch, gauge, and count drive links accurately. Mark the chain with tape to keep track of your measurements easily.
Match these measurements with manufacturer specs for a proper fit. Doing this ensures your chainsaw runs smoothly and safely.
Keep going to uncover tips on compatibility and safety. Understanding these details will help you maintain your chainsaw bar and chain effectively.
Key Takeaways
– Ensure the chainsaw is off, cooled, and the chain brake is engaged before starting any measurements or adjustments.
Safety first, right? You don’t want the saw running while you’re handling it.
– Locate stamped markings on the bar heel for pitch, gauge, and drive link count; verify with actual measurements if unclear.
Sometimes those markings can be a bit worn or hard to read, so double-checking helps avoid mistakes.
– Measure chain pitch by spacing three rivets, then divide the distance by two using a ruler or calipers for accuracy.
It sounds tricky, but it’s just a simple math step once you have the measurement.
– Count drive links by marking a starting point with tape and carefully tallying each link to ensure correct chain length.
Using tape keeps you from losing your place, especially with longer chains.
– Cross-reference all measurements to confirm compatibility before installation, ensuring proper fit and safe chainsaw operation.
Taking this extra step will save you headaches and keep things running smoothly.
Ensure the Chainsaw Is Powered off and Safe

Before you measure the chainsaw bar, make sure the chainsaw is completely powered off and safe to handle. Always turn off the chainsaw and remove the spark plug or disconnect the battery to prevent accidental starts.
Place the saw on a stable surface and wait until the chain is fully cooled down to avoid burns or unexpected movement. Wear protective gloves and eye gear to shield yourself from sharp edges and potential hazards.
Engage the chain brake to lock the chain in place, stopping it from rotating while you work. Double-check everything is powered off and secure before proceeding.
Taking these safety steps ensures you can measure the bar accurately without risking injury or damaging the chainsaw. It’s better to be safe than sorry!
Remove or Loosen the Chain From the Bar
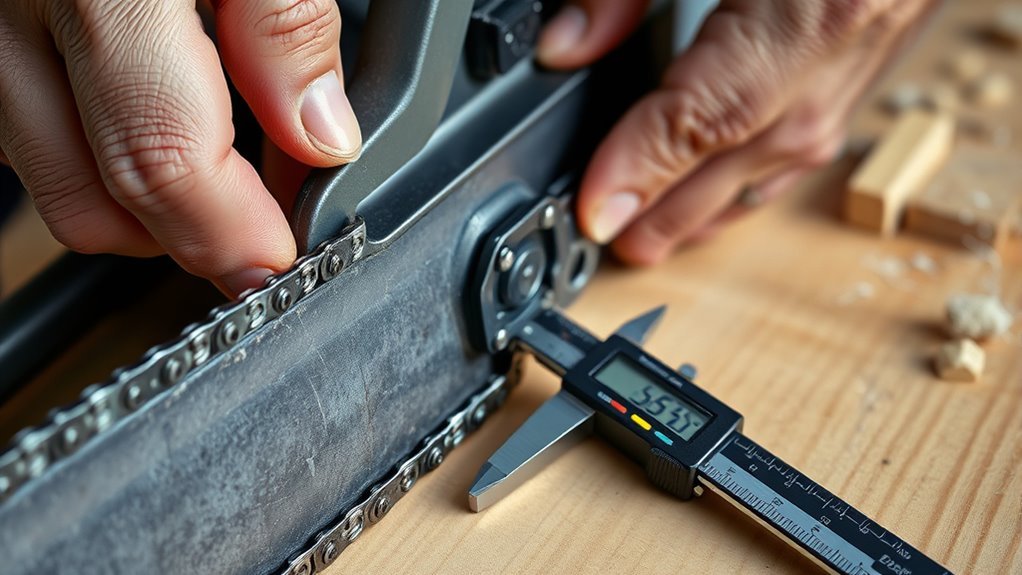
How do you safely loosen the chain from the chainsaw bar? First, release the chain brake and confirm the saw is off and cooled. Use a screwdriver or chain tensioning tool to loosen the tensioner screw, which reduces pressure on the chain.
Next, carefully lift the chain away from the guide bar, starting at the nose or tensioned side, taking care not to damage it. If your chainsaw has a side plate or cover, unscrew the nuts or bolts holding it in place to fully access and remove the chain.
When you’re done measuring or adjusting, just reverse these steps. Make sure the chain sits properly in the groove and is tensioned to the manufacturer’s specs for safe operation. Easy, right?
Locate Stamped Measurements on the Bar Heel

Although it might take a close look, you’ll find the stamped measurements on the heel of the chainsaw bar, near where it attaches to the sprocket. These markings usually include the pitch (like 3/8 or .325), gauge (such as .050 or .058), and the drive link count (for example, 56 DL).
They’re either molded or engraved directly into the metal, making them easy to spot once you know where to look. Checking these numbers carefully is essential since they tell you the exact specifications needed to match the correct chain.
If the stamped info is worn or unclear, you can always confirm the size by measuring the bar heel with calipers or counting the drive links manually. This guarantees you get the right fit every time.
Measure the Pitch of the Chain Manually
To measure the pitch of your chainsaw chain manually, start by identifying three consecutive rivets on the chain. Use a ruler or calipers to measure the distance between the centers of the first and third rivets, then divide that length by two.
This calculation provides you with the pitch, which helps verify your chain matches the bar specifications. It’s a simple step but really important to get the right fit for your chainsaw.
Identify Rivet Spacing
Wondering how to find the pitch of your chainsaw chain? Identifying rivet spacing is key.
You’ll measure the distance between rivets to determine the chain’s pitch, which ensures it fits your sprocket and guide bar perfectly.
Follow these steps:
- Select three consecutive rivets on the chain, making sure they’re aligned straight.
- Use a ruler or digital calipers to measure the distance from the center of the first rivet to the center of the third rivet.
- Divide that measurement by two to get the pitch, usually expressed in inches (like 3/8 inch).
Getting an accurate rivet spacing measurement guarantees your chainsaw runs smoothly and safely with the right components.
It’s a simple step that makes a big difference in performance!
Calculate Pitch Length
How exactly do you calculate the pitch length of your chainsaw chain manually? First, measure the distance between three consecutive rivets using a ruler or calipers. Make sure the rivets are aligned straight, not skewed, for an accurate reading.
Once you have the measurement, divide it by two to get the pitch length. For example, if the distance is 3/4 inch, the pitch is 3/8 inch.
Double-check this measurement against the pitch stamped on your chain—common sizes are 3/8 inch or .325 inch. Since pitch is consistent throughout the chain, measuring multiple sections can confirm your accuracy.
Knowing the correct pitch guarantees the chain fits the sprocket and guide bar properly, which is vital for safe and efficient chainsaw operation. So, it’s worth taking your time to get it right!
Measure the Gauge of the Chain Links
Although it might seem small, the gauge of the chain links plays a crucial role in your chainsaw’s performance. The gauge is the thickness of the drive links that fit into the guide bar’s groove, typically measured in inches or millimeters.
To measure it, use calipers or a gauge tool on the bottom of a drive link. Common gauges include .043″, .050″, .058″, and .063″, each matching specific guide bar grooves. Ensuring this match prevents chain slippage or binding.
Keep these points in mind:
- Measure the thickness precisely with calipers or a gauge tool.
- Match the chain gauge to the guide bar groove width.
- Verify gauge measurements before buying or replacing the chain.
Count the Number of Drive Links Accurately
To count the drive links accurately, start by identifying each bottom link that fits into the bar’s groove. Mark your starting point with tape so you don’t lose track as you follow the chain around.
Take your time and double-check your count to make certain you don’t miss any links, especially on worn or stretched chains. It really helps to be patient here—rushing might cause you to miss a link or two.
Identifying Drive Links
When you’re counting drive links, start at a marked point like a piece of tape to keep track easily. Drive links are the flat, bottom sections of the chain that fit into the guide bar groove, connecting each link.
To identify them clearly, focus on their distinct shape and position.
Remember these key points:
- Each drive link sits at the chain’s bottom, guiding it along the bar groove.
- Count every drive link around the full chain loop without skipping or repeating.
- The total number of drive links stays constant, even if the chain stretches over time.
If you’re unsure, double-check the count on the chain’s packaging or consult your saw’s specifications. That way, you can be sure you have a perfect match.
Counting Techniques
How exactly do you guarantee you count every drive link without missing or repeating any? Start by marking the first link with tape to keep your place.
Count each bottom link carefully, moving consistently clockwise or counterclockwise. Make sure you recognize drive links by their uniform shape, distinct from cutting teeth or tie straps.
Double-check your total against manufacturer specs or packaging to confirm accuracy.
| Step | Action | Tip |
|---|---|---|
| 1 | Mark first drive link | Use bright tape |
| 2 | Count links consistently | Choose clockwise or counterclockwise |
| 3 | Identify drive links | Look for uniform shape |
| 4 | Avoid skipping/double-count | Track every link methodically |
| 5 | Verify total count | Match with packaging or specs |
Use Tape to Mark and Track Drive Link Counting
Although counting the drive links on a chainsaw bar can be tricky, using a small piece of masking or painter’s tape helps you keep track without losing your place.
Start by placing the tape on the first drive link before you begin counting. Keep the tape fixed as you move along the chain to avoid double counting or skipping links.
The tape acts as a visual anchor, guiding you through the entire loop confidently. Pretty handy, right?
Here’s how to use tape effectively:
- Mark your starting point on the chain’s drive links with tape.
- Maintain the tape’s position to track your progress accurately.
- Reposition the tape if you need to pause or verify your count later.
This method ensures precise drive link counting every time. Easy and reliable!
Compare Measurements With Manufacturer Specifications
Before installing your chainsaw chain, make sure you compare your measurements—pitch, gauge, and drive links—with the manufacturer’s specifications to guarantee a proper fit and safe operation.
Always check the stamped numbers on the guide bar and confirm they match the recommended chain size in your saw’s manual. If the specs aren’t clearly visible, use digital calipers for accurate pitch and gauge measurements.
Count the drive links carefully, then verify this number against the chain’s listed drive link count. Cross-referencing all these details with the manufacturer’s guidelines helps avoid mismatched chains, which can cause safety hazards or operational issues.
Taking this step ensures your chainsaw runs smoothly and safely every time you use it. It’s a simple but crucial part of maintaining your equipment.
Understand the Difference Between Bar Length and Chain Length
After you’ve confirmed your chain’s pitch, gauge, and drive links match the manufacturer’s specs, it’s essential to understand how bar length differs from chain length. Bar length, stamped on the saw, shows the maximum cutting capacity in inches but doesn’t directly reveal the chain size.
Confirm chain pitch, gauge, and drive links before understanding that bar length shows cutting capacity, not chain size.
Chain length depends on the total number of drive links, which varies with pitch and gauge.
Keep these key points in mind:
- Bar length indicates cutting reach, not the chain’s actual length.
- Chain length is measured by counting drive links, vital for proper fit.
- Mismatching chain and bar can cause unsafe operation or damage.
Always match the chain’s drive link count and gauge to your guide bar and sprocket for safe, effective use. It’s the best way to keep your saw running smoothly and safely.
Verify Compatibility Before Purchasing Replacement Chains
Before buying a replacement chain, check the stamped numbers on your guide bar for pitch, gauge, and drive link count. Make sure the pitch matches exactly by measuring the distance between rivets.
Count the drive links carefully to verify length. Matching these specs ensures your new chain fits properly and runs safely. It’s a simple step that can save you from a lot of hassle later on.
Check Bar Stamps
When you’re looking to replace your chainsaw chain, checking the stamped numbers on the heel of the guide bar is essential to guarantee compatibility. These markings usually indicate the pitch, gauge, and drive link count, which must match your replacement chain.
Look for stamps like “3/8 LP,” “.050,” and “56 DL” to verify the chain fits properly. If the stamps are missing or unclear, measure the pitch and gauge manually and count your chain’s drive links.
Always double-check with the chain’s packaging or the manufacturer’s guide.
To ensure proper fit:
- Identify pitch, gauge, and drive link count from bar stamps.
- Confirm these specs match your replacement chain.
- Cross-reference with manufacturer’s recommendations before buying.
Match Pitch Precisely
Checking the stamps on your chainsaw bar helps you identify the pitch, but you’ll want to confirm it precisely before buying a replacement chain.
To do this, measure the distance between three consecutive rivets on the chain, then divide that number by two. This gives you the pitch, which should match the stamped pitch on the bar or chain—typically 3/8, .325, or .050 inches.
If the markings are worn or unclear, use digital calipers for an accurate measurement. Always match the new chain’s pitch to your existing chain and bar to avoid jamming or damaging the sprocket gear.
Ensuring pitch compatibility keeps your chainsaw running smoothly and safely. Never guess—accurate measurement is key.
Confirm Drive Links
A essential step in ensuring your replacement chain fits properly is confirming the drive link count on your existing chain or guide bar. This number is often stamped on the chain or guide bar itself and must match exactly to avoid fit issues or safety risks.
If unclear, count the bottom links manually or measure around the chain loop. Make sure the drive link count aligns with your chainsaw’s pitch and gauge specifications. Always double-check before installation to guarantee compatibility with the sprocket and guide bar.
- Locate and note the stamped drive link count on the chain or guide bar.
- Manually count or measure if the stamped number is missing or worn.
- Confirm the drive link count matches your chainsaw’s pitch and gauge before buying.
Frequently Asked Questions
How to Correctly Measure a Chainsaw Chain?
You measure a chainsaw chain by counting the drive links, using a digital caliper to check the gauge, and determining the pitch by dividing the distance between three rivets by two or reading the stamped pitch number.
It might sound a bit technical at first, but once you get the hang of it, it’s pretty straightforward. Just take your time and double-check your measurements to make sure everything fits perfectly.
Can I Put a 20 Inch Bar on a 16-Inch Chainsaw?
You can put a 20-inch bar on a 16-inch chainsaw only if your saw’s engine and sprocket support it.
Check your manufacturer’s specs, and match the chain size to avoid strain or damage.
It’s important to make sure everything lines up right. Otherwise, you could cause problems with your saw.
How to Measure Bar Size?
You might think the chain length tells you the bar size, but it doesn’t.
Measure from the tip of the bar to where it enters the saw body. Make sure the saw’s off and the bar’s cool first.
What Is the Actual Length of a 20 Inch Chainsaw Bar?
The actual cutting length of a 20-inch chainsaw bar is about 19 inches.
You’ll find the bar length listed from tip to mounting point, but the usable cutting area is slightly less than the full 20 inches.
Conclusion
Now that you’ve mastered measuring your chainsaw bar, you’re ready to tame any timber beast with confidence.
Think of your chainsaw as an extension of your own hands—precise measurement is the heartbeat that keeps it roaring strong.
By following these steps, you’re not just measuring metal; you’re crafting the perfect harmony between tool and task.
So, gear up and let every cut sing with power and precision!
Measuring your chainsaw bar correctly ensures you get the right fit for your chain and optimal performance.
Remember, a well-measured bar means safer cutting and better results every time you take on the wood.
Keep these easy steps in mind, and your chainsaw will always be ready to deliver clean, efficient cuts with ease.